1- Open Apple Mail
- Open Mail from your dock or open the program from the Applications folder.
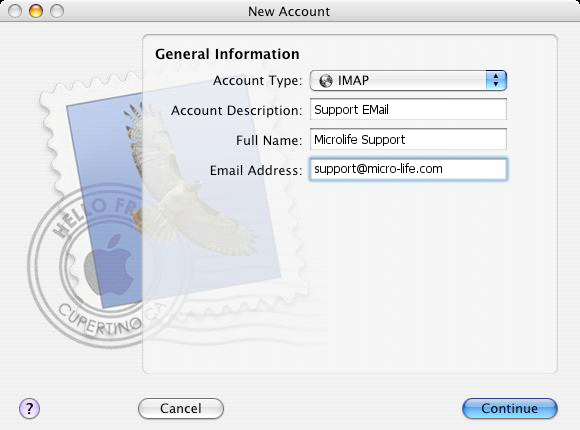
2- Enter general information.
- The Mail Setup window appears the first time you set up Mail.
- Note: For Mac OS 10.6.x, enter your full name, email address, and username and password at this step. If "searching for mail servers..." takes more than a minute, click Cancel, and then click Continue.
- Select IMAP as your Account Type.
- Enter the name you want to call the account in the Account Description field.
- Enter your Full Name and Email Address in their relevant fields.
- Click Continue.
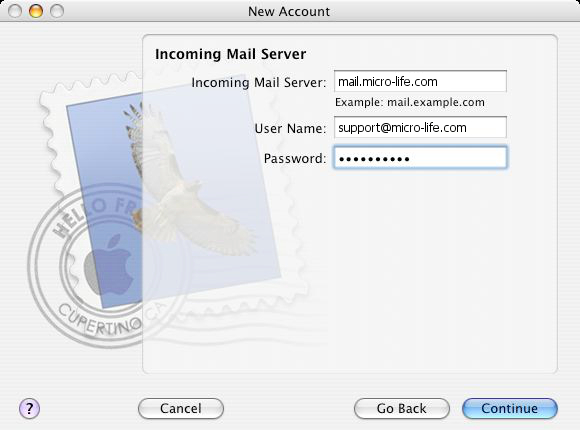
3- Enter incoming server information.
- Enter mail.micro-life.com in the Incoming Mail Server field with change micro-life.com to your domain.
- Note: For Mac OS 10.6.x, also choose IMAP for Account Type, and enter a description for this account.
- Enter your full EMail in User Name and Password in the relevant fields.
- Click Continue. Mail connects to the incoming mail server to verify your settings.
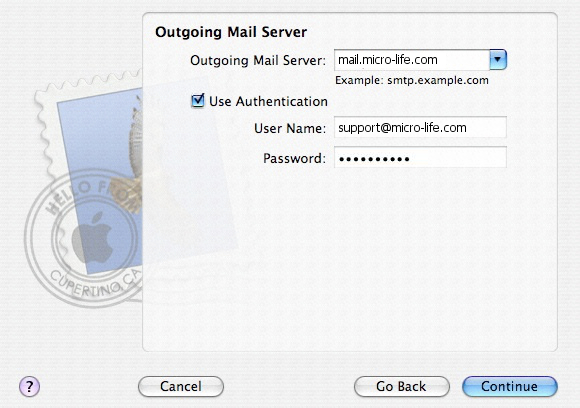
4- Enter outgoing server information.
- Select mail.micro-life.com from the Outgoing Mail Server (SMTP) drop-down menu (You will find your own domain instead micro-life.com).
- Check Use Authentication, and enter your full EMail and password.
- Click Continue.
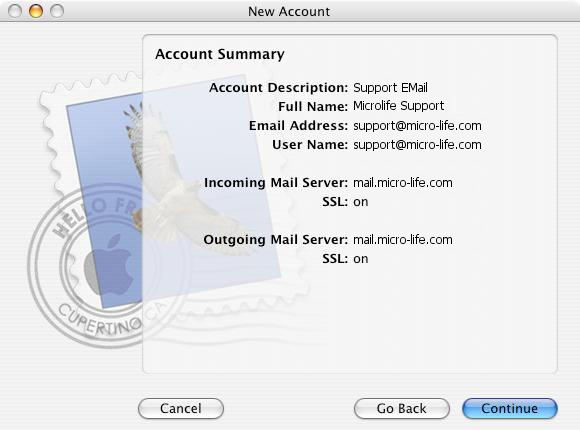
5- Finish mail setup.
- Verify your information in the Account Summary window.
- Click Continue.
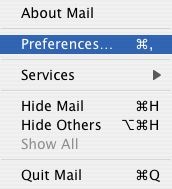
6- Open preferences.
- Select Preferences from the main Mail menu.
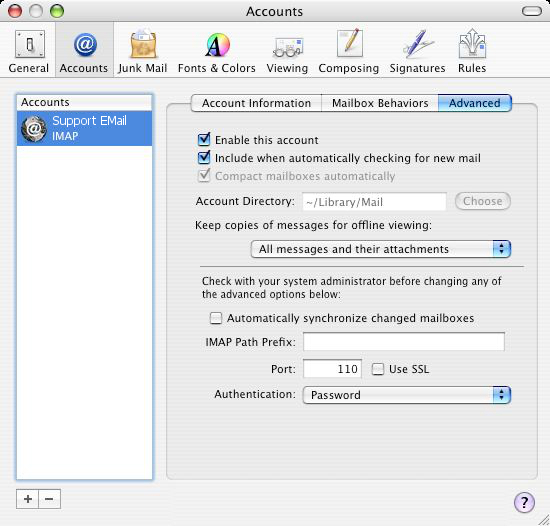
7- Enter advanced settings.
- Select Accounts.
- Select the account you wish to modify from the Accounts list.
- Click the Advanced tab.
- Select Enable this account, if not already selected.
- Leave the rest of the fields at their default settings.
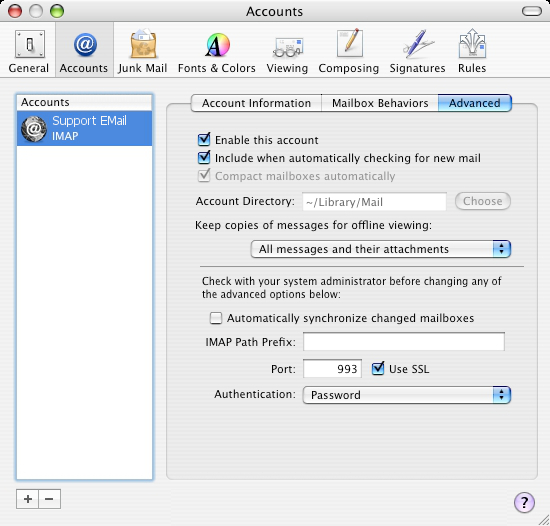
8- Configure SSL for send and receive.
- Select Preferences from the main Mail menu. With SSL, your computer communicates with mail server over an encrypted channel.
- Select the account you wish to modify from the Accounts list.
- Click the Advanced tab.
- Click Use SSL. The port number changes automatically from 143 to 993.
- Set the Authentication field to Password.
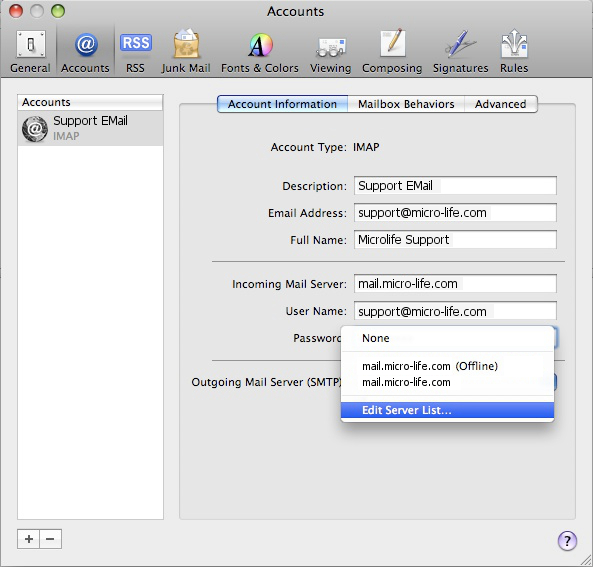
9- Open the Server Settings window.
- Click the Account Information tab.
- Click the up/down arrow next to Outgoing Mail Server (SMTP).
- Click Edit Server List...
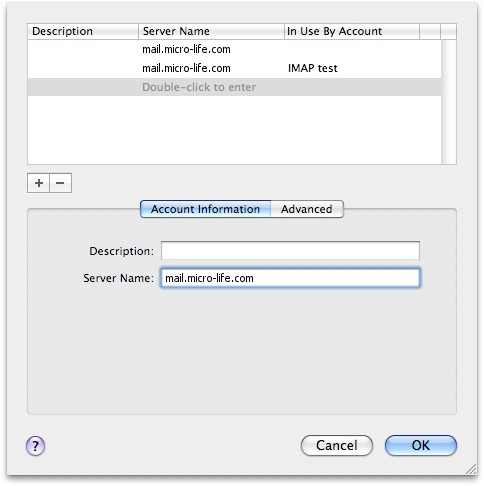
10- Add or modify a server
- Click the + sign to add a new server, or double click on the current server to modify or verify settings.
- Enter mail.micro-life.com in the Server Name field with change micro-life.com to your domain.
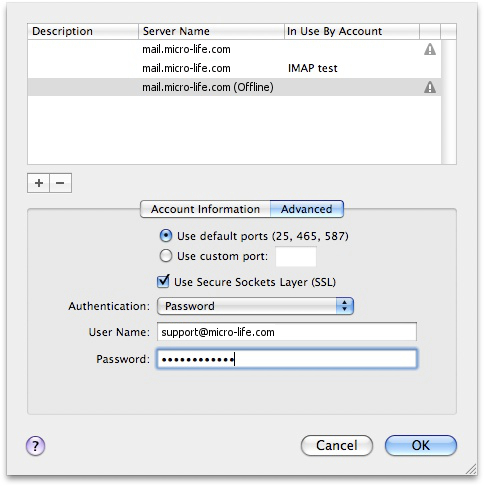
11- Edit Advanced settings.
- Click the Advanced tab.
- Select Use default ports (25,465,587).
- Select Use Secure Sockets Layer (SSL).
- Select Password from the drop-down menu next to Authentication.
- Enter your full EMail and password in the relevant fields.
- Click OK, then close the window.
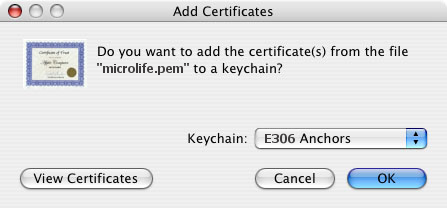
12- Verify the server's identity.
- Download the certificate to your desktop.
- Firefox customers: Hold down the control key and click the hyperlink. Choose Save link and save to your desktop.
- Double-click the new digicert.crt file on your desktop.
- For Leopard (OS 10.5.x), select E306 Anchors from the Keychain drop-down menu when the Add Certificates window appears.
- For Snow Leopard (OS 10.6.x), the digicert.crt file will automatically be entered into Keychain Access.
- Double click DigiCert Security Service CA in Keychain Access.
- Click on the right arrow next to Trust.
- Select Always Trust in the drop-down menu next to "When using this certificate."
- Click OK to finish.
- Close and restart Mail.
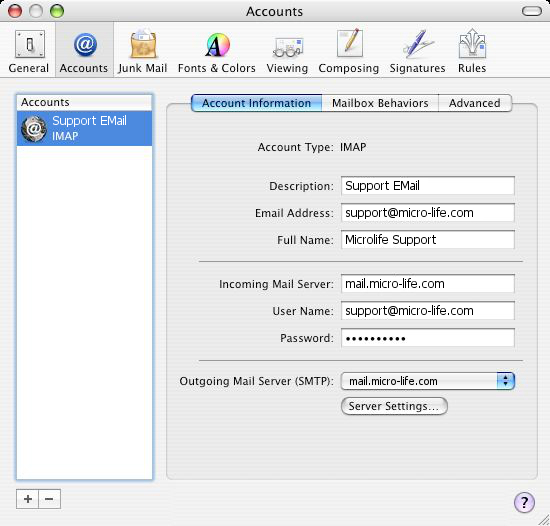
13- Verify your settings.
- Select Preferences from the main Mail menu.
- Select the account you wish to verify or change from the Accounts list.
- Verify your email address and name.
- Verify the Incoming and Outgoing Mail Servers.
- Verify the User Name and Password.
- Close the window.
14- Add an additional account.
- Select Preferences from the Mail menu.
- Click the + sign at the bottom left-hand corner of the Accounts window.
- Enter your new account information following the steps above.

15- Configure attachment settings.
- Click Edit on the main menu bar at the top of your screen.
- Scroll down to Attachments and select Always Insert Attachments at End of Message.
